2023. 5. 8. 10:40ㆍ자바/스프링
지난 포스팅에서 @EnableWebMvc 어노테이션에 대해 알아보았다. 짧게 요약할 수 있지만 개인적으로 이해가 안되기도 했고, 구성을 어떻게 할지 한참 고민하다가 어영부영 대충 마무리했다. 그런데 거기에 너무 시간과 정성을 많이 쏟은 나머지 분량을 초과해버리고... 정작 중요한 핵심을 다 못짚고 넘어갔다. 이번에는 MVC Config에서 중요한 핵심인 WebMvcConfigurer와 이를 활용해서 어떻게 Configuration을 등록하는지 알아보도록 하겠다.
WebMvcConfigurer
WebMvcConfigurer는 기본적으로 제공해주는 MVC Configuration을 커스터마이징할 수 있도록 인터페이스이다. 여기에서는 formatter도 등록할 수 있고, interceptors나 resolver, 혹은 handler 등등도 직접 커스터마이징해서 등록할 수 있다.
WebMvcConfigurer를 구현한 클래스에 @Configuration 어노테이션을 붙이면 기본적으로 스프링에서 제공해주는 Configuration에 더불어서 우리의 커스터마이징한 Configuration을 추가할 수 있는 것이다.
지난 포스팅에서 WebMvcConfigurer에 대해 위와 같이 표현했었다. 이번에는 공식문서에서 소개하는 커스터마이징 방법에 대해 알아보도록 하겠다.
메서드 이름을 살펴봐~
WebMvcConfigurer는 메서드의 이름 prefix에 다음과 같은 규칙이 있다.
- add~: 기본 설정이 없는 빈들에 대해 새로운 빈을 추가한다.
- configure~: setter를 통해서 기존의 설정을 대신 등록한다.
- extend~: 기존의 설정을 이용하고 추가로 설정을 확장한다.
위의 사실을 기억하고있으면 메서드명만 보더라도 메서드가 무슨 동작을 하는지 알 수 있다. )
(출처: 망나니 개발자)
public interface WebMvcConfigurer {

	default void configurePathMatch(PathMatchConfigurer configurer) {
	}

	default void configureContentNegotiation(ContentNegotiationConfigurer configurer) {
	}

	default void configureAsyncSupport(AsyncSupportConfigurer configurer) {
	}

	default void configureDefaultServletHandling(DefaultServletHandlerConfigurer configurer) {
	}

	default void addFormatters(FormatterRegistry registry) {
	}

	default void addInterceptors(InterceptorRegistry registry) {
	}

	default void addResourceHandlers(ResourceHandlerRegistry registry) {
	}

	default void addCorsMappings(CorsRegistry registry) {
	}

	default void addViewControllers(ViewControllerRegistry registry) {
	}

	default void configureViewResolvers(ViewResolverRegistry registry) {
	}

	default void addArgumentResolvers(List<HandlerMethodArgumentResolver> resolvers) {
	}

	default void addReturnValueHandlers(List<HandlerMethodReturnValueHandler> handlers) {
	}

	default void configureMessageConverters(List<HttpMessageConverter<?>> converters) {
	}

	default void extendMessageConverters(List<HttpMessageConverter<?>> converters) {
	}

	default void configureHandlerExceptionResolvers(List<HandlerExceptionResolver> resolvers) {
	}

	default void extendHandlerExceptionResolvers(List<HandlerExceptionResolver> resolvers) {
	}

	@Nullable
	default Validator getValidator() {
		return null;
	}

	@Nullable
	default MessageCodesResolver getMessageCodesResolver() {
		return null;
	}

}
간단하게 먼저 살펴보면 이전 포스팅에서 가져왔던 예시를 다시 한번 더 보자.
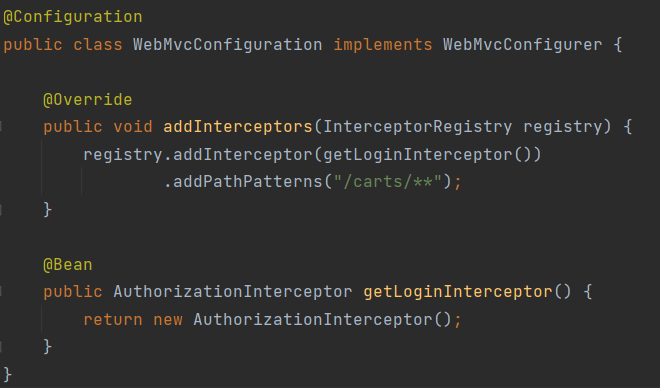
addInterceptors라는 메서드를 오버라이드해서 내가 만든 Interceptor를 추가했다. Spring에서는 기본적으로 등록되는 Interceptor가 없기 때문에 위와 같이 add 라는 어노테이션을 붙여서 Interceptor를 추가한다.
하지만 HandlerExceptionResolver는 기본적으로 등록되기 때문에 기존에 제공됐던 기능을 사용하지 않을 거면 configureHandlerExceptionResolvers 메서드를, 기존에 제공된 기능을 확장할거면 extendHandlerExceptionResolver 메서드를 오버라이드해서 사용하면 된다.
자, 이제 공식문서에서 나와있는 내용을 본격적으로 확인해보자.
MVC Config API
@Configuration
@EnableWebMvc
public class WebConfig implements WebMvcConfigurer {

    // Implement configuration methods...
}
위와 같이 @Configuration 어노테이션과 @EnableWebMvc 어노테이션을 함께 사용해서 커스터마이즈한 Configuration을 구성할 수 있다. @EnableWebMvc 어노테이션의 역할은 이전 포스팅에서 나름 자세히 설명했으니 거기에 있는 글을 참고하면 좋을 것 같다.
뭐 다른 어노테이션과 동일하게 어노테이션 대신 XML을 사용해서도 이를 구성할 수 있다.
'<mvc:annotation-driven/>'이라는 태그를 사용하면 위에 어노테이션을 사용한 것과 동일하게 동작한다.
<?xml version="1.0" encoding="UTF-8"?>
<beans xmlns="http://www.springframework.org/schema/beans"
    xmlns:mvc="http://www.springframework.org/schema/mvc"
    xmlns:xsi="http://www.w3.org/2001/XMLSchema-instance"
    xsi:schemaLocation="
        http://www.springframework.org/schema/beans
        https://www.springframework.org/schema/beans/spring-beans.xsd
        http://www.springframework.org/schema/mvc
        https://www.springframework.org/schema/mvc/spring-mvc.xsd">

    <mvc:annotation-driven/>

</beans>
Type Conversion
WebMvcConfigurer를 구현하면 Formatter를 등록해서 Type Conversion도 할 수 있다.
@Configuration
@EnableWebMvc
public class WebConfig implements WebMvcConfigurer {

    @Override
    public void addFormatters(FormatterRegistry registry) {
        // ...
    }
}
위와 같이 포매터를 등록할 수 있다. 이 또한 XML로 등록할 수 있다.
<?xml version="1.0" encoding="UTF-8"?>
<beans xmlns="http://www.springframework.org/schema/beans"
    xmlns:mvc="http://www.springframework.org/schema/mvc"
    xmlns:xsi="http://www.w3.org/2001/XMLSchema-instance"
    xsi:schemaLocation="
        http://www.springframework.org/schema/beans
        https://www.springframework.org/schema/beans/spring-beans.xsd
        http://www.springframework.org/schema/mvc
        https://www.springframework.org/schema/mvc/spring-mvc.xsd">

    <mvc:annotation-driven conversion-service="conversionService"/>

    <bean id="conversionService"
            class="org.springframework.format.support.FormattingConversionServiceFactoryBean">
        <property name="converters">
            <set>
                <bean class="org.example.MyConverter"/>
            </set>
        </property>
        <property name="formatters">
            <set>
                <bean class="org.example.MyFormatter"/>
                <bean class="org.example.MyAnnotationFormatterFactory"/>
            </set>
        </property>
        <property name="formatterRegistrars">
            <set>
                <bean class="org.example.MyFormatterRegistrar"/>
            </set>
        </property>
    </bean>

</beans>
다소 어떤 메서드를 오버라이드할 것인지, 어떤 포매터를 등록할 건지 등등 내용을 추가하다보니 복잡해진 것을 알 수 있다.
공식 문서에서는 포매터에 대한 예시로 NumberFormat과 DateTimeFormat을 커스터마이즈할 수 있다고 소개하고 있다.
@Configuration
@EnableWebMvc
public class WebConfig implements WebMvcConfigurer {

    @Override
    public void addFormatters(FormatterRegistry registry) {
        DateTimeFormatterRegistrar registrar = new DateTimeFormatterRegistrar();
        registrar.setUseIsoFormat(true);
        registrar.registerFormatters(registry);
    }
}
따로 포매터를 등록하는 예시이다. 위에서 등록한 DateTimeFormatterRegistrar을 한번 살펴보자.
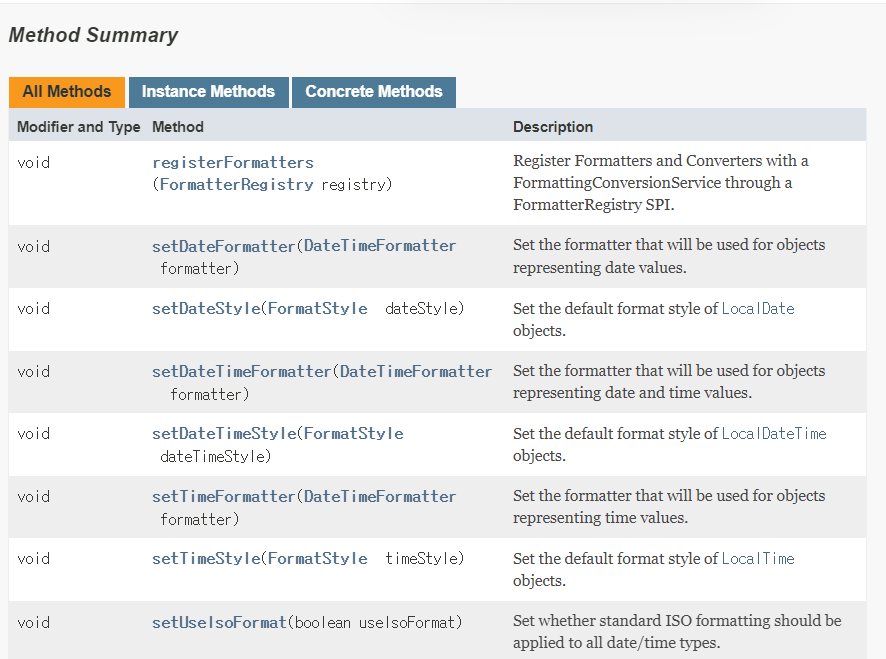
DateTimeFormatterRegistrar은 위와 같은 메서드를 제공한다. 뭐... 설명만 보면 크게 어려운 부분은 없어서 이 정도만 짚고 넘어가도록 하겠다.
Validation
기본적으로 Bean Validation이 classpath에 존재한다면, @Valid와 Validated를 사용해 global Validator를 사용할 수 있도록 LocalValidatorFactoryBean이 등록되어있다. 음... 솔직히 무슨 말인지 잘 모르겠다.
어쨌든 여기서 핵심은 WebMvcConfigurer를 이용해 global Validator를 등록할 수 있다는 점이다.
@Configuration
@EnableWebMvc
public class WebConfig implements WebMvcConfigurer {

    @Override
    public Validator getValidator() {
        // ...
    }
}
여기서는 특이하게 getValidator라는 메서드를 사용하고 있다. 여기 return 값에 validator를 전달하면 그 validator를 전역적으로 사용할 수 있다.
만약 특정한 컨트롤러에서만 사용하고 싶다면 @InitBinder 어노테이션을 사용하면 된다.
@Controller
public class MyController {

    @InitBinder
    protected void initBinder(WebDataBinder binder) {
        binder.addValidators(new FooValidator());
    }
}
이 어노테이션은 이전 포스팅을 한번 읽어보면 도움이 될 것 같다.
2023.04.22 - [자바/스프링] - 스프링 공식 문서 뿌수기(4), Spring MVC의 Annotated Controllers - DataBinder
@InitBinder에 대해 간단하게만 설명하면 이 또한 마찬가지로 포매터나 Validator 등을 등록할 수 있는 역할을 하는데, 이는 컨트롤러 내부에서 사용하는 용도이다. 일종의 작은 Configuration이라고 생각하면 된다.
Interceptors
위에서 봤던 예시이다. Interceptor를 등록할 때 사용한다. 이게 무엇인지는 나중에 다른 포스팅에서 설명하도록 하겠다. 이것도 간단하게 설명하자면 서블릿에서 핸들러에게 전달되는 요청과 응답을 중간에 가로채서 우리가 지정한 동작을 하는 것이라고 생각하면 된다.
@Configuration
@EnableWebMvc
public class WebConfig implements WebMvcConfigurer {

    @Override
    public void addInterceptors(InterceptorRegistry registry) {
        registry.addInterceptor(new LocaleChangeInterceptor());
        registry.addInterceptor(new ThemeChangeInterceptor()).addPathPatterns("/**").excludePathPatterns("/admin/**");
    }
}
이 또한 아래와 같이 interceptors를 xml로 추가할 수 있다.
<mvc:interceptors>
    <bean class="org.springframework.web.servlet.i18n.LocaleChangeInterceptor"/>
    <mvc:interceptor>
        <mvc:mapping path="/**"/>
        <mvc:exclude-mapping path="/admin/**"/>
        <bean class="org.springframework.web.servlet.theme.ThemeChangeInterceptor"/>
    </mvc:interceptor>
</mvc:interceptors>
Content Types
Spring MVC가 request를 통해 전달되는 Media Type를 결정할 수 있다. 이를 테면 Accept header나 URL path extension, query parameter 등을 설정할 수 있다. 뭐... 그렇다고는 하는데 지금 단계에서는 MediaType 정도만 알아도 되지 않을까싶다.
@Configuration
@EnableWebMvc
public class WebConfig implements WebMvcConfigurer {

    @Override
    public void configureContentNegotiation(ContentNegotiationConfigurer configurer) {
        configurer.mediaType("json", MediaType.APPLICATION_JSON);
        configurer.mediaType("xml", MediaType.APPLICATION_XML);
    }
}
위와 같이 mediaType을 설정할 수 있다. 이 경우에는 "json"과 "xml"이 바로 key 값이 되고, 해당 키 값으로 URL path extension, query parameter이 들어온 경우에는 오른쪽에 각각 설정한 MediaType.APPLICATION_JSON 이나 APPLICATION_XML이 처리된다. 즉, 처리할 수 있는 컨텐츠 타입을 늘려준다고 생각하면 된다. (무슨 전략같은게 나오긴 하지만 지금으로서는 구글링을 해봐도 이해가 안된다... 나중에 여유가 될 때 한번 추가해보도록 하겠다.)
<mvc:annotation-driven content-negotiation-manager="contentNegotiationManager"/>

<bean id="contentNegotiationManager" class="org.springframework.web.accept.ContentNegotiationManagerFactoryBean">
    <property name="mediaTypes">
        <value>
            json=application/json
            xml=application/xml
        </value>
    </property>
</bean>
위의 어노테이션을 xml로 바꾼 것이다.
Message Converters
MessageConverter는 configure~와 extend~ 두 가지 메서드가 모두 존재한다. 따라서 위에서 설명했던 것처럼 기존에 있는 기능을 확장할수도 있고, 기존 기능 대신 새로 설정한 기능으로 처리할 수도 있다. 다음은 기존 기능 대신 새로 커스터마이징한 기능으로 추가하는 코드이다.
@Configuration
@EnableWebMvc
public class WebConfiguration implements WebMvcConfigurer {

    @Override
    public void configureMessageConverters(List<HttpMessageConverter<?>> converters) {
        Jackson2ObjectMapperBuilder builder = new Jackson2ObjectMapperBuilder()
                .indentOutput(true)
                .dateFormat(new SimpleDateFormat("yyyy-MM-dd"))
                .modulesToInstall(new ParameterNamesModule());
        converters.add(new MappingJackson2HttpMessageConverter(builder.build()));
        converters.add(new MappingJackson2XmlHttpMessageConverter(builder.createXmlMapper(true).build()));
    }
}
json <-> 객체로 직렬화/역직렬화를 할 때 사용하는 ObjectMapper를 직접 커스터마이징하는 코드이다. 해당 코드에서는 객체를 직렬화/역직렬화할 때 dateFormat을 설정해주는 것을 볼 수 있다.
<mvc:annotation-driven>
    <mvc:message-converters>
        <bean class="org.springframework.http.converter.json.MappingJackson2HttpMessageConverter">
            <property name="objectMapper" ref="objectMapper"/>
        </bean>
        <bean class="org.springframework.http.converter.xml.MappingJackson2XmlHttpMessageConverter">
            <property name="objectMapper" ref="xmlMapper"/>
        </bean>
    </mvc:message-converters>
</mvc:annotation-driven>

<bean id="objectMapper" class="org.springframework.http.converter.json.Jackson2ObjectMapperFactoryBean"
      p:indentOutput="true"
      p:simpleDateFormat="yyyy-MM-dd"
      p:modulesToInstall="com.fasterxml.jackson.module.paramnames.ParameterNamesModule"/>

<bean id="xmlMapper" parent="objectMapper" p:createXmlMapper="true"/>
View Controllers
뷰 컨트롤러에 대해서도 설정해줄 수 있다. 실행할 Controller 로직이 없는 경우에는 뷰 컨트롤러에 경로를 추가해줄 수 있다.
@Configuration
@EnableWebMvc
public class WebConfig implements WebMvcConfigurer {

    @Override
    public void addViewControllers(ViewControllerRegistry registry) {
        registry.addViewController("/").setViewName("home");
    }
}
xml로는 아주 간단하게 처리할 수 있다.
<mvc:view-controller path="/" view-name="home"/>
그리고 @RequestMapping으로 url을 매핑하는 경우에는 addViewControllers에서 addViewController로 동일한 url 경로를 추가해도 set에 설정한 경로로 가지 않는다. @RequestMapping으로 설정된 경우에는 메서드에 따라서 405 예외(METHOD_NOT_ALLOWED)나 415 예외(UNSUPPORTED_MEDIA_TYPE) 등등 처리가 되는 것을 의도할 수 있지만 무작정 set으로 설정한 경로로 간다면 이 의도에서 벗어날 여지가 있기 때문이다. 따라서ViewController와 Annotated Controller에서 url 처리를 나누지 않는 것을 권장한다고 한다.
View Resolvers
View Resolver를 등록할 수도 있다. 아래는 JSON을 랜더링하기 위해 view Resolver를 구성하는 예시이다.
@Configuration
@EnableWebMvc
public class WebConfig implements WebMvcConfigurer {

    @Override
    public void configureViewResolvers(ViewResolverRegistry registry) {
        registry.enableContentNegotiation(new MappingJackson2JsonView());
        registry.jsp();
    }
}
xml을 사용하면 다음과 같다.
<mvc:view-resolvers>
    <mvc:content-negotiation>
        <mvc:default-views>
            <bean class="org.springframework.web.servlet.view.json.MappingJackson2JsonView"/>
        </mvc:default-views>
    </mvc:content-negotiation>
    <mvc:jsp/>
</mvc:view-resolvers>
View Resolver와 관련해서 자세한 것은 다음에 살펴보도록 하자.
Stataic resource
정적 리소스를 제공할 때 방법도 제시할 수 있다. 아래 예시는 /resouces로 시작하는 요청에 대해서 '웹 애플리케이션 하위의 /public 상태 경로'나 '/static 경로 하위의 classpath'에서 리소스를 찾는다. 이때 cache 기한도 지정할 수 있는데, 최대 1년까지 브라우저 캐싱을 지원한다는 의미가 다.
@Configuration
@EnableWebMvc
public class WebConfig implements WebMvcConfigurer {

    @Override
    public void addResourceHandlers(ResourceHandlerRegistry registry) {
        registry.addResourceHandler("/resources/**")
                .addResourceLocations("/public", "classpath:/static/")
                .setCacheControl(CacheControl.maxAge(Duration.ofDays(365)));
    }
}
개인적으로 이는 xml의 가독성이 더 좋아보인다.
<mvc:resources mapping="/resources/**"
    location="/public, classpath:/static/"
    cache-period="31556926" />
Default Servlet
기본 서블릿의 처리 우선순위도 설정할 수 있다.(라는 말 같다. 이해 x)
구글링을 해봐서 이해못한 부분을 추가해보면 다음과 같다.
Spring MVC는 기본적으로 DispatcherServlet을 /에 매핑해서 가장 높은 우선순위를 갖도록 했다. 그래서 DispatcherServlet이 아닌 다른 서블릿을 사용하고자 한다면 다음과 같이 configure를 추가해야한다. 이땐 경로가 아닌 기본 서블릿의 이름을 명시해야한다.
@Configuration
@EnableWebMvc
public class WebConfig implements WebMvcConfigurer {

    @Override
    public void configureDefaultServletHandling(DefaultServletHandlerConfigurer configurer) {
        configurer.enable("myCustomDefaultServlet");
    }
}
다음은 xml이다.
<mvc:default-servlet-handler default-servlet-name="myCustomDefaultServlet"/>
근데... 이거면 서블릿을 만들어야하는 것 같은데, 지금 우리가 알 필요가 있나?하는 생각이 들기도 한다.
Path Matching
경로 매칭과 관련된 커스터마이징도 할 수 있다.
@Configuration
@EnableWebMvc
public class WebConfig implements WebMvcConfigurer {

    @Override
    public void configurePathMatch(PathMatchConfigurer configurer) {
        configurer.addPathPrefix("/api", HandlerTypePredicate.forAnnotation(RestController.class));
    }

    private PathPatternParser patternParser() {
        // ...
    }
}
위와 같이 코드를 작성하면 RestController 어노테이션이 있는 클래스에 대해서 /api url을 prefix한 것과 마찬가지로 구성할 수 있다.
이를테면 다음과 같이 클래스에서 @RequestMapping을 통해 직접 명시하는 것과 동일한 결과를 가져온다.

위의 Configuration을 설정하면 @RequestMapping이 없어도 동일하게 동작한다.
이는 버저닝을 할 때 사용하면 따로 코드를 직접 수정하지 않아도 되기에 유지보수에 용이해보인다.
위의 코드는 아래와 같이 xml로 구성할 수 있다.
<mvc:annotation-driven>
    <mvc:path-matching
        path-helper="pathHelper"
        path-matcher="pathMatcher"/>
</mvc:annotation-driven>

<bean id="pathHelper" class="org.example.app.MyPathHelper"/>
<bean id="pathMatcher" class="org.example.app.MyPathMatcher"/>
여기까지 MVC config에 대한 내용이다. 사실 과하게 조사한 면이 있긴 하지만 어디까지 조사할까하다가 이번에는 가볍게 한번 훑어봤다. 각 기능별로 구체적으로 어떤 메서드가 있는지 확인하기보단 '이런 것도 가능하구나~'하는 것만 아는 정도로 넘어갔으니 참고하면 좋을 것 같다!
'자바 > 스프링' 카테고리의 다른 글
| 토비의 스프링, 스프링 AOP 뿌수기 (1), 빌드업 (0) | 2023.05.17 |
|---|---|
| 스프링 공식 문서 뿌수기(13), Bean (0) | 2023.05.10 |
| 스프링 공식 문서 뿌수기(11), MVC config - @EnableWebMvc (1) | 2023.05.08 |
| 스프링 공식 문서 뿌수기(10), DispatcherServlet - handler 실습 (0) | 2023.05.06 |
| 스프링 공식 문서 뿌수기(9), DispatcherServlet - 동작 과정 (1) | 2023.05.06 |